
How to redirect old pages to a New page in WordPress?

Photo Credit: Rheo
To redirect old pages to new ones, is one of the essential activity that you must perform on your website to keep it healthy.
If you have ever tried to change the slug of a published post, you must have experienced that the URL of the article has changed. Well, it is not an issue, if not you have shared the older URL with someone or somewhere. The older URL will throw a 301 error. So what is the solution? Let’s learn how to redirect old page to a new page in WordPress.
We have actually two ways to do it. The first method is to use the “.htaccess” file and the other is to use a plugin.
How to redirect?
Using the “.htaccess” file
This method is straightforward. You need to access the root folder of your website where WordPress is installed. There you will find a file by the name “.htaccess”. This is an extremely important file, as it is used to record high-level server configurations. On Apache Web Server (your website hosting server), this file permits you to make changes without editing direct server configuration and is limited to your website only.
To access this file you need to access the file manager from your website control panel, or some FTP client like FileZilla. I am using FileZilla here. Install and log in to your website using your FTP credentials.
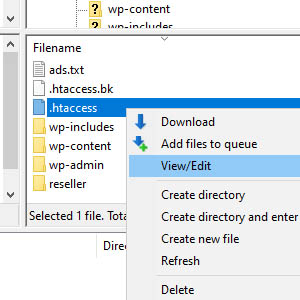
Now right-click on the “.htaccess” file, and left-click on the “View/Edit” option. It is always strongly suggested to keep a backup of your “.htaccess” file before you edit it. Simply copy the file and paste it at the same location.
Once you click on “View/Edit”, you will find some configuration already written in the file.
Just before the closing tag of “IfModule”, add a line for each redirect, exactly in the following format:
<IfModule mod_rewrite.c>
	RewriteEngine On
	RewriteRule .* - [E=HTTP_AUTHORIZATION:...
	RewriteBase /
	RewriteRule ^index\.php$ - [L]
	RewriteCond %{REQUEST_FILENAME} !-f
	RewriteCond %{REQUEST_FILENAME} !-d
	RewriteRule . /index.php [L]
</IfModule>
RedirectMatch 301 {old-url} {new-url}
Replace {old-url} with your old URL, {new-url} with the new URL. If you need 5 different URL redirects, you have to add 5 such lines of configuration. Make sure those lines are within the “IfModule” opening and closing tags (<IfModule> and </IfModule>).
Example:
<IfModule mod_rewrite.c>
	RewriteEngine On
	RewriteRule .* - [E=HTTP_AUTHORIZATION:...
	RewriteBase /
	RewriteRule ^index\.php$ - [L]
	RewriteCond %{REQUEST_FILENAME} !-f
	RewriteCond %{REQUEST_FILENAME} !-d
	RewriteRule . /index.php [L]

        RedirectMatch 301 /old-slug-1 /new-slug-1
        RedirectMatch 301 /old-slug-2 /new-slug-2
        RedirectMatch 301 /old-slug-3 /new-slug-3
</IfModule>
Once you are done with the changes, save the file and then close it. Once that’s done, in “FileZilla”, you will find a popup opened, advising that the file has changed. Click on the check box that says “Finish editing and delete local file”, and then click the “Yes” button to upload the changes to your server.

That’s all you have to do. You can now try your old URLs, which will now redirect to your new URL.
Using WordPress plugins
Install
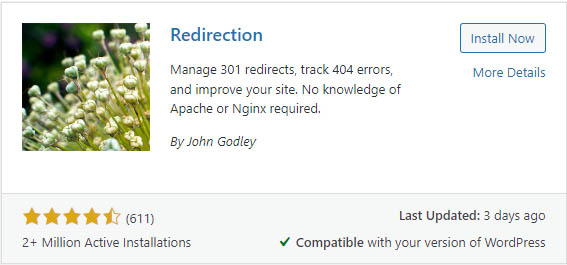
If you do not wish to get into the above technical mumbo-jumbo, you can use a WordPress plugin. Search, install and activate the plugin called “Redirection”.
Then under the installed plugins section of your WordPress administration, click on “Settings” of Redirection Plugin and then click on the “Start Setup” Button.
Configure
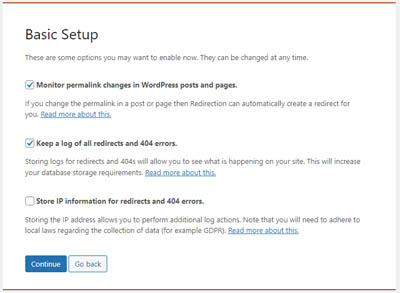
Under the Basic Setup section, select the checks on “Monitor permalink changes in WordPress posts and pages” and “Keep a log of all redirects and 404 errors”. Then click on the “Continue” button.
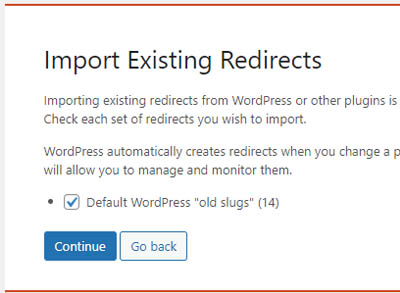
Next, select the check on “Default WordPress “old slugs” if you have them in the “Import Existing Redirects” section and again click the button “Continue”. Once that is done, the plugin will run short testing. Wait for it to finish, and then click on the button “Finish Setup”.
The plugin will now perform a few activities, just keep on clicking “Ok” and “Continue” to finish those activities. Once done, your WordPress website is ready to handle all 404 errors and 301 redirects.
Suggested Reads
- The best tips for beginners to create your own website.
- How to Make Your Website Google friendly?
- How to read your domain emails using Gmail?
- Start Online Business: Everything You Need to Know
- How to start your blog and start blogging?
- How to start your online store?
- How a Website Works? - Under the hood.
- Create your Personal Portfolio Website that stands out.
- How to Permanently Stop Spam on your WordPress Website?
- How to redirect old pages to a New page in WordPress?